Custom Native Android Code
With Capacitor, you are encouraged to write Java or Kotlin code to implement the native features your app needs.
There may not be a Capacitor plugin for everything–and that’s okay! It is possible to write WebView-accessible native code right in your app.
WebView-Accessible Native Code
The easiest way to communicate between JavaScript and native code is to build a custom Capacitor plugin that is local to your app.
EchoPlugin.java
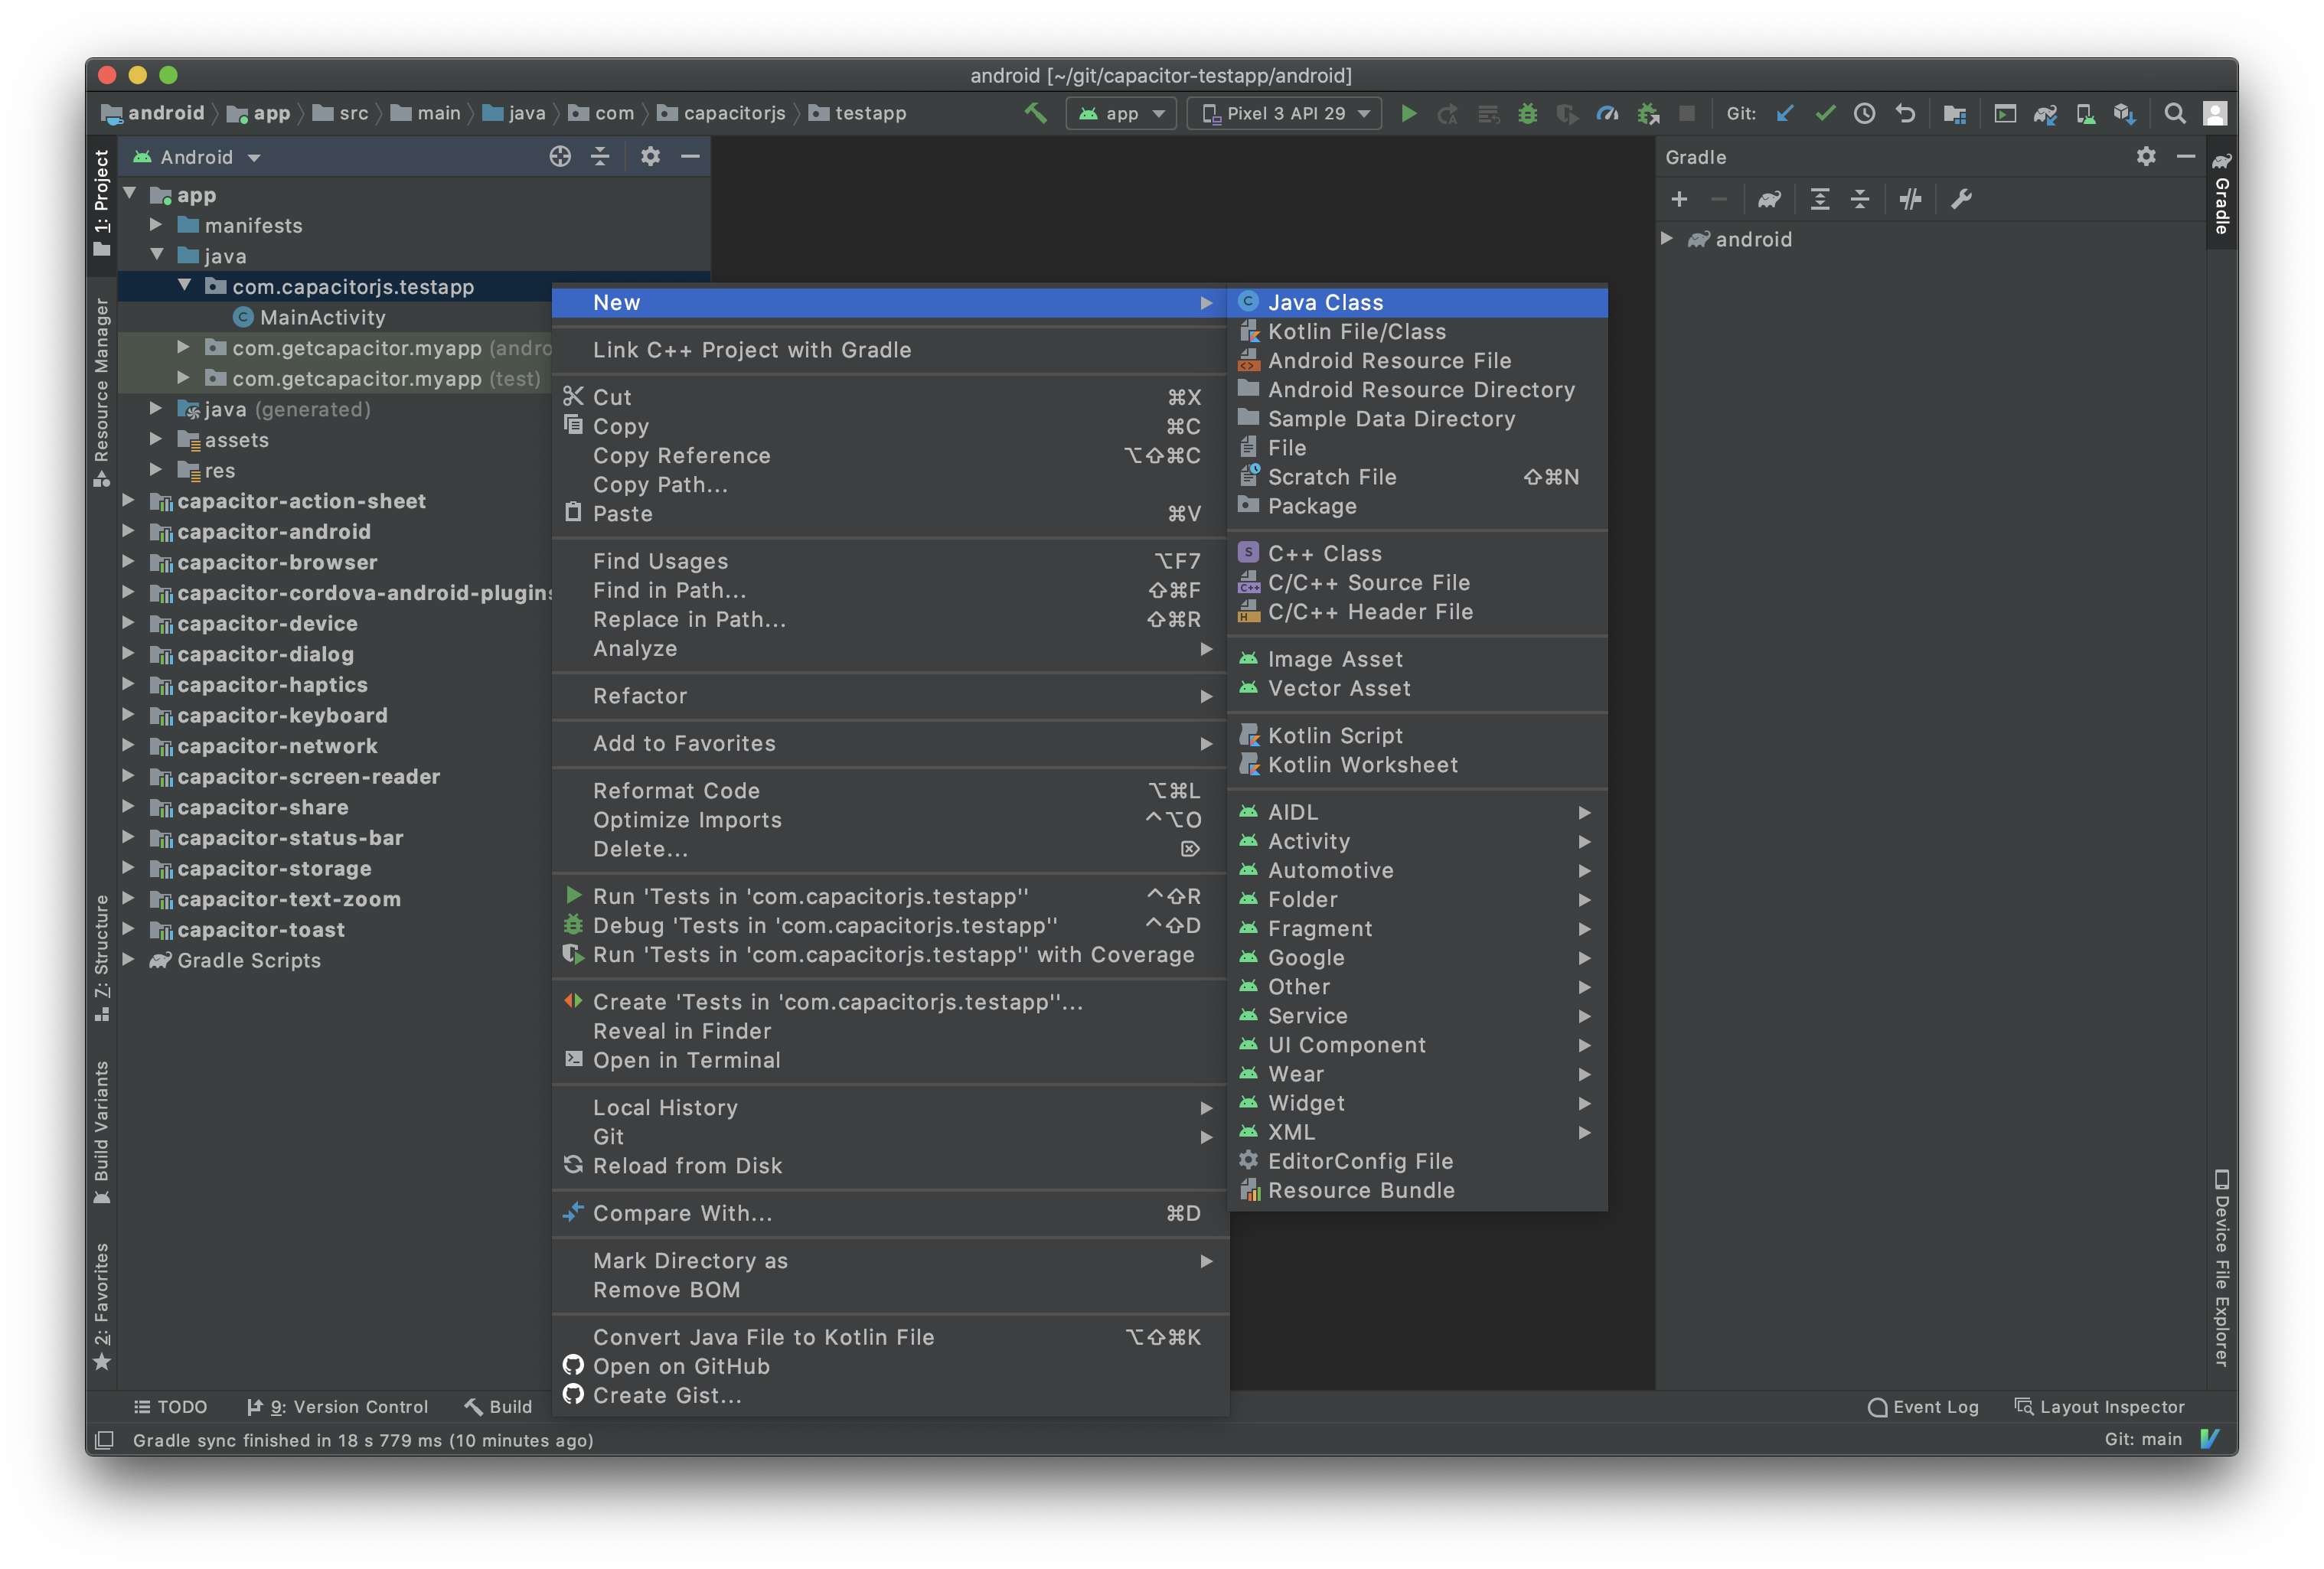
First, create a EchoPlugin.java file by
opening Android Studio, expanding the
app module and the
java folder, right-clicking on your app’s Java package, selecting
New ->
Java Class from the context menu, and creating the file.

Copy the following Java code into EchoPlugin.java:
package com.example.myapp;

import com.getcapacitor.JSObject;
import com.getcapacitor.Plugin;
import com.getcapacitor.PluginCall;
import com.getcapacitor.PluginMethod;
import com.getcapacitor.annotation.CapacitorPlugin;

@CapacitorPlugin(name = "Echo")
public class EchoPlugin extends Plugin {

    @PluginMethod()
    public void echo(PluginCall call) {
        String value = call.getString("value");

        JSObject ret = new JSObject();
        ret.put("value", value);
        call.resolve(ret);
    }
}
Register the Plugin
We must register custom plugins on both Android and web so that Capacitor can bridge between Java and JavaScript.
MainActivity.java
In your app’s MainActivity.java, use
registerPlugin() or
registerPlugins() to register your custom plugin(s).
 public class MainActivity extends BridgeActivity {
     @Override
     public void onCreate(Bundle savedInstanceState) {
         super.onCreate(savedInstanceState);
+        registerPlugin(EchoPlugin.class);
     }
 }
JavaScript
In JS, we use
registerPlugin() from
@capacitor/core to create an object which is linked to our Java plugin.
import { registerPlugin } from '@capacitor/core';

const Echo = registerPlugin('Echo');

export default Echo;
The first parameter to
registerPlugin()is the plugin name, which must match thenameattribute of our@CapacitorPluginannotation inEchoPlugin.java.
TypeScript
We can define types on our linked object by defining an interface and using it in the call to
registerPlugin().
 import { registerPlugin } from '@capacitor/core';

+export interface EchoPlugin {
+  echo(options: { value: string }): Promise<{ value: string }>;
+}

-const Echo = registerPlugin('Echo');
+const Echo = registerPlugin<EchoPlugin>('Echo');

 export default Echo;
The generic parameter of
registerPlugin() is what defines the structure of the linked object. You can use
registerPlugin<any>('Echo') to ignore types if you need to. No judgment. ❤️
Use the Plugin
Use the exported
Echo object to call your plugin methods. The following snippet will call into Java on Android and print the result:
import Echo from '../path/to/echo-plugin';

const { value } = await Echo.echo({ value: 'Hello World!' });
console.log('Response from native:', value);
Next Steps
Read the Android Plugin Guide ›


